Introduction
During exams, many students forget the different image formation cases because of time pressure and stress. It is not easy to remember every case. For example, a concave mirror has several object positions, and a convex lens also has multiple image formation cases. Remembering the image position, image nature, and image size for each case can be confusing.
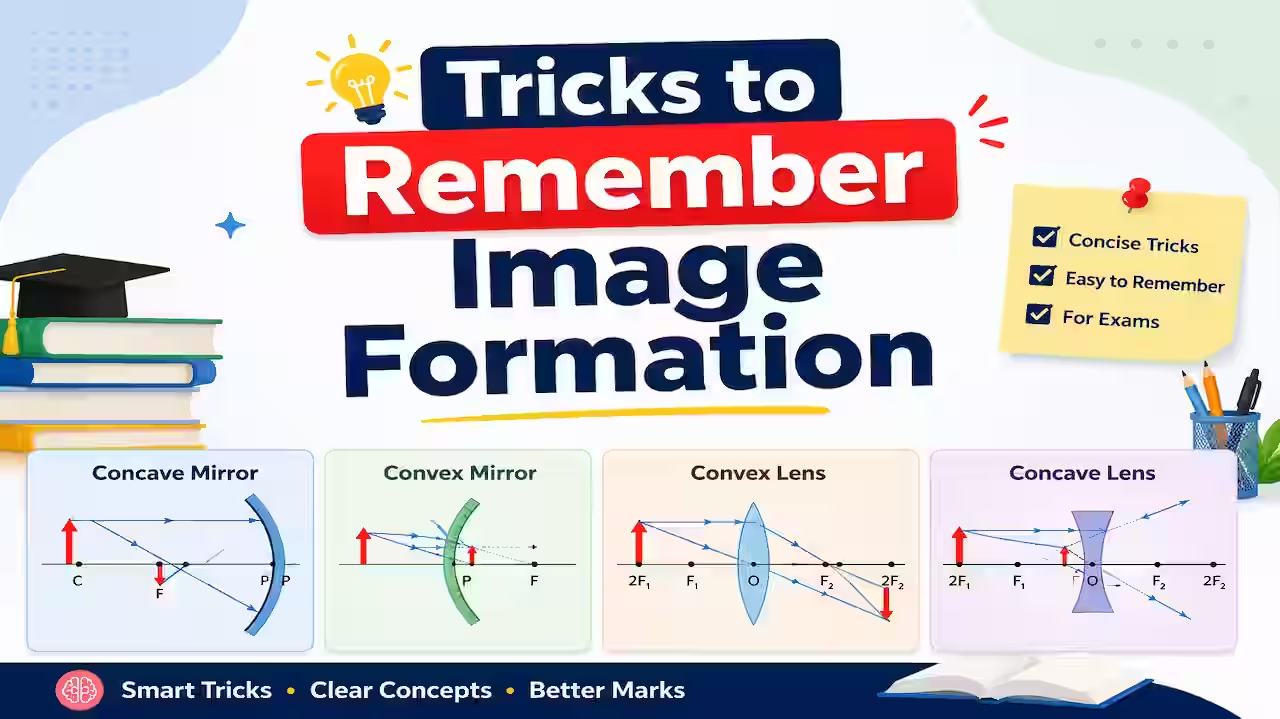
In this article, I will share simple and easy Tricks to Remember Image Formation in spherical mirrors and lenses. These tricks will help you quickly remember the object position, image position, image nature, and image size. They are especially useful for students preparing for Class 10 Board Exams, RRB Group D, SSC, NEET, JEE, and other competitive exams.
Disclaimer: Always understand the concept before using any memory trick. Tricks are meant to make revision and recall easier, not to replace learning. If you already know the basics, these Tricks to Remember Image Formation will help you remember the image formation cases quickly during an exam.
Before learning the tricks, let’s first understand the basic concepts of image formation.
Basics of Image Formation
Before learning the memory tricks, you should understand a few basic concepts of image formation. If your basics are clear, the tricks will be much easier to remember.
What is an Image?
An image is a copy of an object that is formed when light rays are reflected by a mirror or refracted through a lens.
Depending on the type of mirror or lens and the position of the object, the image may be:
- Bigger or smaller
- Upright or upside down
- Real or virtual
Example
When you look into a mirror, you see your own image. Similarly, a camera lens forms the image of an object on the camera sensor.
What is Image Formation?
Image formation is the process by which a mirror or a lens forms an image of an object.
- A mirror forms an image by reflecting light rays.
- A lens forms an image by refracting (bending) light rays.
The image formed depends on:
- The type of mirror or lens
- The position of the object
Types of Images
There are two types of images.
1. Real Image
A real image is formed when light rays actually meet after reflection or refraction.
Features of a Real Image
- Can be obtained on a screen.
- Usually inverted (upside down).
- Formed in front of a mirror or on the opposite side of a lens.
Example: The image formed on a cinema screen or a projector screen.
2. Virtual Image
A virtual image is formed when light rays do not actually meet but appear to meet when extended backward.
Features of a Virtual Image
- Cannot be obtained on a screen.
- Usually erect (upright).
- Appears behind a mirror or on the same side of a lens as the object.
Example: Your image in a plane mirror.
Erect and Inverted Images
Erect Image
An erect image is upright, just like the object.
Inverted Image
An inverted image is upside down.
Size of an Image
The size of an image can be:
- Magnified: The image is bigger than the object.
- Same Size: The image and the object are equal in size.
- Diminished: The image is smaller than the object.
Remember These Four Things
Whenever you study image formation, always check these four questions:
- Where is the object placed?
- Where is the image formed?
- What is the nature of the image? (Real or Virtual)
- What are the size and orientation of the image? (Magnified, Same Size, or Diminished; Erect or Inverted)
If you can answer these four questions, understanding image formation becomes much easier.
Now that you know the basics, let’s learn some simple tricks to remember image formation in spherical mirrors and lenses.
Table of Concave and Convex Mirrors
Concave Mirror Image Formation Cases
| Case | Position of Object | Position of Image | Size of Image | Nature of Image |
|---|---|---|---|---|
| 1 | At Infinity | At Focus (F) | Highly Diminished (Point-sized) | Real and Inverted |
| 2 | Beyond Centre of Curvature (C) | Between Focus (F) and Centre of Curvature (C) | Diminished | Real and Inverted |
| 3 | At Centre of Curvature (C) | At Centre of Curvature (C) | Same Size | Real and Inverted |
| 4 | Between Focus (F) and Centre of Curvature (C) | Beyond Centre of Curvature (C) | Enlarged (Magnified) | Real and Inverted |
| 5 | At Focus (F) | At Infinity | Highly Enlarged | Real and Inverted |
| 6 | Between Focus (F) and Pole (P) | Behind the Mirror | Enlarged (Magnified) | Virtual and Erect |
Convex Mirror Image Formation Cases
| Case | Position of Object | Position of Image | Size of Image | Nature of Image |
|---|---|---|---|---|
| 1 | At Infinity | At Focus (F), behind the mirror | Highly Diminished (Point-sized) | Virtual and Erect |
| 2 | Anywhere in Front of the Mirror (Between Infinity and Pole) | Between Pole (P) and Focus (F), behind the mirror | Diminished | Virtual and Erect |
Tricks to Remember Image Formation (Spherical Mirrors)
Nature of the Image
Let’s first learn the nature of the image, because this is one of the most important topics in exams. Examiners often ask whether the image is real or virtual and erect or inverted.
We will start with the concave mirror, followed by the convex mirror.
Concave Mirror
The good news is that you do not have to memorize every image formation case for a concave mirror.
In a concave mirror, the image is real and inverted in almost every case. There is only one special case that is different.
The Special Case
When the object is placed between the Focus (F) and the Pole (P):
| Property | Description |
|---|---|
| Position of Object | Between Focus (F) and Pole (P) |
| Position of Image | Behind the mirror |
| Size of Image | Enlarged (Magnified) |
| Nature of Image | Virtual and Erect |
If you remember this one special case, you don’t need to memorize the remaining cases separately.
For all other object positions, the image formed by a concave mirror is always:
- Real
- Inverted
Trick to Remember the Special Case
Just remember this sentence:
“Focus on your goal. Your life will be enlarged. Virtual dreams become real, so you won’t be left behind.”
How to Decode the Sentence
- Focus → The object is near the Focus (F).
- Goal → Think of the Pole (P). This reminds you that the object is placed between the Focus and the Pole.
- Enlarged → The image is magnified.
- Virtual → The image is virtual.
- Behind → The image is formed behind the mirror.
That’s it!
Simply remember this one special case. For every other object position in a concave mirror, the image is real and inverted.
Convex Mirror
A convex mirror has only two image formation cases.
The best part is that both cases have the same image nature.
No matter where the object is placed, the image formed by a convex mirror is always:
- Virtual
- Erect
So, if an exam asks:
“What is the nature of the image formed by a convex mirror?”
You can confidently answer:
Virtual and Erect
There is no need to memorize separate cases for the image nature.
Position of Object, Position of Image, and Image Size
Concave Mirror
We already learned the special case where the object is placed between the Focus (F) and the Pole (P). So now, we only need to remember the remaining five cases.
The good news is that you don’t have to memorize all five separately. We can understand them using a few simple patterns.
Master Trick 1: Infinity ↔ Focus
The first and most important rule is:
Whenever “Infinity” comes on one side, “Focus” comes on the other side, and vice versa.
Simply remember:
Infinity ⇄ Focus
This one rule helps you remember five different cases.
Case 1: Infinity → Focus (i → F)
| Property | Description |
|---|---|
| Position of Object | At Infinity |
| Position of Image | At Focus (F) |
| Size of Image | Highly Diminished (Point-sized) |
| Nature of Image | Real and Inverted |
Memory Trick
The image is formed at the Focus.
Think like this:

“To see a tiny image, you need to focus carefully.”
Since the image is very small (point-sized), Focus = Small Image.
Case 2: Focus → Infinity (F → i)
This case is exactly the opposite of Case 1.
| Property | Description |
|---|---|
| Position of Object | At Focus (F) |
| Position of Image | At Infinity |
| Size of Image | Highly Enlarged |
| Nature of Image | Real and Inverted |
Memory Trick
The image is formed at Infinity.
Remember:
“Infinity means something very big.”
So,
Infinity = Highly Enlarged Image
Master Trick 2: Centre Always Meets Centre
Whenever the object is placed at the Centre of Curvature (C), the image is also formed at the Centre of Curvature (C).
Think of it like this:
“Centre always meets Centre.”
Case 3: Centre of Curvature → Centre of Curvature (C → C)
| Property | Description |
|---|---|
| Position of Object | At Centre of Curvature (C) |
| Position of Image | At Centre of Curvature (C) |
| Size of Image | Same Size |
| Nature of Image | Real and Inverted |
Memory Trick
This case is the easiest.
- Centre → Centre
- Same Position → Same Size
So, no extra trick is needed.
Case 4: Between Infinity and C → Between Focus and C
| Property | Description |
|---|---|
| Position of Object | Between Infinity and Centre of Curvature (C) |
| Position of Image | Between Focus (F) and Centre of Curvature (C) |
| Size of Image | Diminished |
| Nature of Image | Real and Inverted |
Memory Trick
Use Master Trick 1.
Replace:
- Infinity with Focus
Now the image position becomes:
Between Focus and Centre of Curvature
Since the image is near the Focus, remember:
“Focus on small things.”
So the image is diminished.
Case 5: Between Focus and C → Between C and Infinity
This is simply the opposite of Case 4.
| Property | Description |
|---|---|
| Position of Object | Between Focus (F) and Centre of Curvature (C) |
| Position of Image | Between Centre of Curvature (C) and Infinity |
| Size of Image | Enlarged |
| Nature of Image | Real and Inverted |
Memory Trick
Again, use Master Trick 1.
Replace:
- Focus with Infinity
Now the image position becomes:
Between Centre of Curvature and Infinity
Since Infinity represents something very large,
remember:
“Infinity means a big image.”
So the image is enlarged.
Convex Mirror
A convex mirror has only two image formation cases, so it is much easier to remember.
Also remember one important rule:
The image formed by a convex mirror is always Virtual and Erect.
Case 1: Infinity → Focus (i → F)
| Property | Description |
|---|---|
| Position of Object | At Infinity |
| Position of Image | At Focus (F) |
| Size of Image | Highly Diminished (Point-sized) |
| Nature of Image | Virtual and Erect |
Memory Trick
The image forms at the Focus.
Think:
“Focus carefully because the image is very small.”
This is the same trick used for the concave mirror.
Case 2: In Front of the Mirror → Between Pole and Focus
| Property | Description |
|---|---|
| Position of Object | In Front of the Mirror |
| Position of Image | Between Pole (P) and Focus (F) |
| Size of Image | Diminished |
| Nature of Image | Virtual and Erect |
Memory Trick
Remember this sentence:
“Focus on your goal in front of you, and the world looks small.”
How to Decode the Sentence
- In front → Object is in front of the mirror.
- Goal → Pole (P).
- Focus → Focus (F).
- Between Goal and Focus → Image is formed between the Pole and the Focus.
- World looks small → The image is diminished (small).
Table of Concave and Convex Lenses
Convex Lens Image Formation Cases
| Case | Position of Object | Position of Image | Size of Image | Nature of Image |
|---|---|---|---|---|
| 1 | At Infinity | At Focus (F₂) on the other side of the lens | Highly Diminished (Point-sized) | Real and Inverted |
| 2 | Beyond 2F₁ | Between F₂ and 2F₂ | Diminished | Real and Inverted |
| 3 | At 2F₁ | At 2F₂ | Same Size | Real and Inverted |
| 4 | Between F₁ and 2F₁ | Beyond 2F₂ | Enlarged (Magnified) | Real and Inverted |
| 5 | At Focus (F₁) | At Infinity | Highly Enlarged | Real and Inverted |
| 6 | Between Optical Centre (O) and Focus (F₁) | On the Same Side of the Lens as the Object | Enlarged (Magnified) | Virtual and Erect |
Concave Lens Image Formation Cases
| Case | Position of Object | Position of Image | Size of Image | Nature of Image |
|---|---|---|---|---|
| 1 | At Infinity | At Focus (F₁) on the Same Side of the Lens as the Object | Highly Diminished (Point-sized) | Virtual and Erect |
| 2 | Anywhere Between the Lens and Infinity | Between the Optical Centre (O) and Focus (F₁) on the Same Side of the Lens as the Object | Diminished | Virtual and Erect |
Tricks to Remember Image Formation (Lenses)
Nature of the Image
Just like spherical mirrors, lenses also follow a simple pattern.
- A convex lens forms a real and inverted image in almost every case.
- There is only one special case that is different.
- A concave lens always forms a virtual and erect image, just like a convex mirror.
So, instead of memorizing every case, you only need to remember:
- One special case for the convex lens.
- One rule for the concave lens.
Convex Lens
The Special Case
| Property | Description |
|---|---|
| Position of Object | Between Optical Centre (O) and Focus (F₁) |
| Position of Image | On the same side of the lens as the object |
| Size of Image | Enlarged (Magnified) |
| Nature of Image | Virtual and Erect |
This is the only special case.
For every other object position, the image formed by a convex lens is always:
- Real
- Inverted
Memory Trick
Remember this sentence:
“Wear your optical lens, focus on your goals, and with the same hard work, your life will become enlarged.”
How to Decode the Sentence
- Optical lens → Optical Centre (O)
- Focus → Focus (F₁)
- Same → Image is formed on the same side of the lens.
- Enlarged → Image is magnified.
That’s all! If you remember this sentence, you can easily recall the special case.
Concave Lens
A concave lens is very easy to remember.
Just like a convex mirror, it always forms a:
- Virtual
- Erect
image.
So, there is no need to memorize different image nature cases.

Position of Object, Position of Image, and Image Size
Convex Lens
The image formation cases of a convex lens are very similar to those of a concave mirror.
So, you can use almost the same tricks.
Master Trick 1: Infinity ↔ Focus
Whenever Infinity appears on one side,
Focus appears on the other side.
Simply remember:
Infinity ⇄ Focus
Case 1: Infinity → Focus (i → F)
| Property | Description |
|---|---|
| Position of Object | At Infinity |
| Position of Image | At Focus (F₂) |
| Size of Image | Highly Diminished (Point-sized) |
| Nature of Image | Real and Inverted |
Memory Trick
The image is formed at the Focus.
Remember:
“Focus carefully because the image is very small.”
This is the same trick used for the concave mirror.
Case 2: Focus → Infinity (F → i)
This is simply the opposite of Case 1.
| Property | Description |
|---|---|
| Position of Object | At Focus (F₁) |
| Position of Image | At Infinity |
| Size of Image | Highly Enlarged |
| Nature of Image | Real and Inverted |
Memory Trick
Remember:
“Infinity means something very big.”
So,
Infinity = Highly Enlarged Image
Master Trick 2: 2F Always Meets 2F
Whenever the object is placed at 2F₁, the image is formed at 2F₂.
Think of it like this:
“2F always meets 2F.”
Case 3: 2F → 2F
| Property | Description |
|---|---|
| Position of Object | At 2F₁ |
| Position of Image | At 2F₂ |
| Size of Image | Same Size |
| Nature of Image | Real and Inverted |
Memory Trick
This case is the easiest.
- 2F → 2F
- Same Position → Same Size
No extra trick is needed.
Case 4: Beyond 2F → Between F and 2F
| Property | Description |
|---|---|
| Position of Object | Beyond 2F₁ |
| Position of Image | Between F₂ and 2F₂ |
| Size of Image | Diminished |
| Nature of Image | Real and Inverted |
Memory Trick
The image position has F and 2F.
Think of it as three F’s (F + 2F).
Remember:
“To see a tiny image, you need to focus three times.”
This reminds you that the image is diminished.
Case 5: Between F and 2F → Beyond 2F
This is exactly the opposite of Case 4.
| Property | Description |
|---|---|
| Position of Object | Between F₁ and 2F₁ |
| Position of Image | Beyond 2F₂ |
| Size of Image | Enlarged |
| Nature of Image | Real and Inverted |
Memory Trick
Compared to Case 4, the image now moves beyond 2F, so it becomes much larger.
Remember:
“The farther the image moves, the bigger it becomes.”
So,
Beyond 2F = Enlarged Image
Concave Lens
A concave lens has only two image formation cases, just like a convex mirror.
Also remember:
Nature of the image is always Virtual and Erect.
Case 1: Infinity → Focus (i → F)
| Property | Description |
|---|---|
| Position of Object | At Infinity |
| Position of Image | At Focus (F₁) on the same side of the lens as the object |
| Size of Image | Highly Diminished (Point-sized) |
| Nature of Image | Virtual and Erect |
Memory Trick
Since the image is formed at the Focus, remember:
“Focus carefully because the image is very small.”
This is the same trick used for the convex mirror.
Case 2: Between Lens and Infinity → Between Optical Centre and Focus
| Property | Description |
|---|---|
| Position of Object | Between the Lens and Infinity |
| Position of Image | Between the Optical Centre (O) and Focus (F₁) on the same side of the lens as the object |
| Size of Image | Diminished |
| Nature of Image | Virtual and Erect |
Memory Trick
Use two simple replacements:
- Lens → Optical Centre (O)
- Infinity → Focus (F₁)
Now remember:
“Focus your eyes carefully because the image is small.”
How to Decode the Trick
- Object is between the Lens and Infinity.
- Replace Lens with Optical Centre.
- Replace Infinity with Focus.
- So, the image forms between the Optical Centre and the Focus.
- Since the image is small, it is diminished.
Common Mistakes Students Make
- Trying to memorize every case separately instead of understanding the pattern behind image formation.
- Confusing real and virtual images, especially in concave mirrors and convex lenses.
- Mixing up erect and inverted images, particularly for virtual images.
- Forgetting the object position (Focus, Centre of Curvature, 2F, etc.), which leads to incorrect answers.
- Not learning the one exception. For example, almost all concave mirror and convex lens cases produce real and inverted images except when the object is between the pole/optical center and focus.
- Confusing mirrors with lenses, such as applying mirror rules to lens questions.
- Ignoring image size (magnified, diminished, or same size), even though exam questions often test it.
- Not practicing ray diagrams, making it difficult to visualize image formation.
- Depending only on rote memorization instead of using memory tricks or logical patterns.
- Skipping revision, causing students to forget object-image relationships before the exam.
Conclusion
Learning image formation doesn’t have to be difficult. Instead of memorizing every mirror and lens case individually, focus on understanding the common patterns and remembering the important exceptions. This simple approach makes concepts easier to recall and helps you solve questions more quickly in school exams as well as competitive exams.
We hope these Tricks to Remember Image Formation help you understand image formation with confidence. Revise these tricks regularly, practice a few ray diagrams, and you’ll be able to answer image formation questions accurately without getting confused.
Frequently Asked Questions (FAQs)
Q1. What are the best Tricks to Remember Image Formation?
A: The best trick is to understand the common pattern and remember only the important exceptions instead of memorizing every case separately.
Q2. Why do students find image formation difficult?
A: Students often confuse the object position, image position, image nature, and image size for different mirrors and lenses.
Q3. Are these image formation tricks useful for competitive exams?
A: Yes. These tricks are helpful for Class 10 Board Exams, SSC, RRB Group D, NEET, JEE, and other competitive exams.
Q4. Should I learn the concepts before using memory tricks?
A: Yes. Always understand the basic concepts first. Memory tricks are meant to make revision and recall easier.
Q5. Which mirrors and lenses are covered in these tricks?
A: These tricks cover concave mirrors, convex mirrors, convex lenses, and concave lenses.